Showing posts with label diy. Show all posts

Monday, January 27, 2014

How to Defuzz Your Sweater

Is your beloved sweater collection looking a little sad? Thrift store finds of once lovely sweaters can be easily passed up when they are covered with pilling and fuzz. Not anymore. Let's perk up those cozy knits, easy peasy.

Tools:
fuzzy sweater
pumice stone

Yes, they make "special" pumice stones for sweaters but they are really the same thing you get from your hardware store.
I do not recommend using an old razor as it can snag and cut fibers. Special combs and electric defuzzers can work wonders but I like low tech- and I'm cheap.

Good sweater candidates for de-pilling:
100% acrylic and acrylic blend sweaters (Target cardigans are perfect!)
100% wool and wool blend

Not so good sweaters for using pumice:
cotton
fine woven fabrics, like silk
angora

Always do a test patch!

Let's get started.

Lay out your sweater on a clean surface.
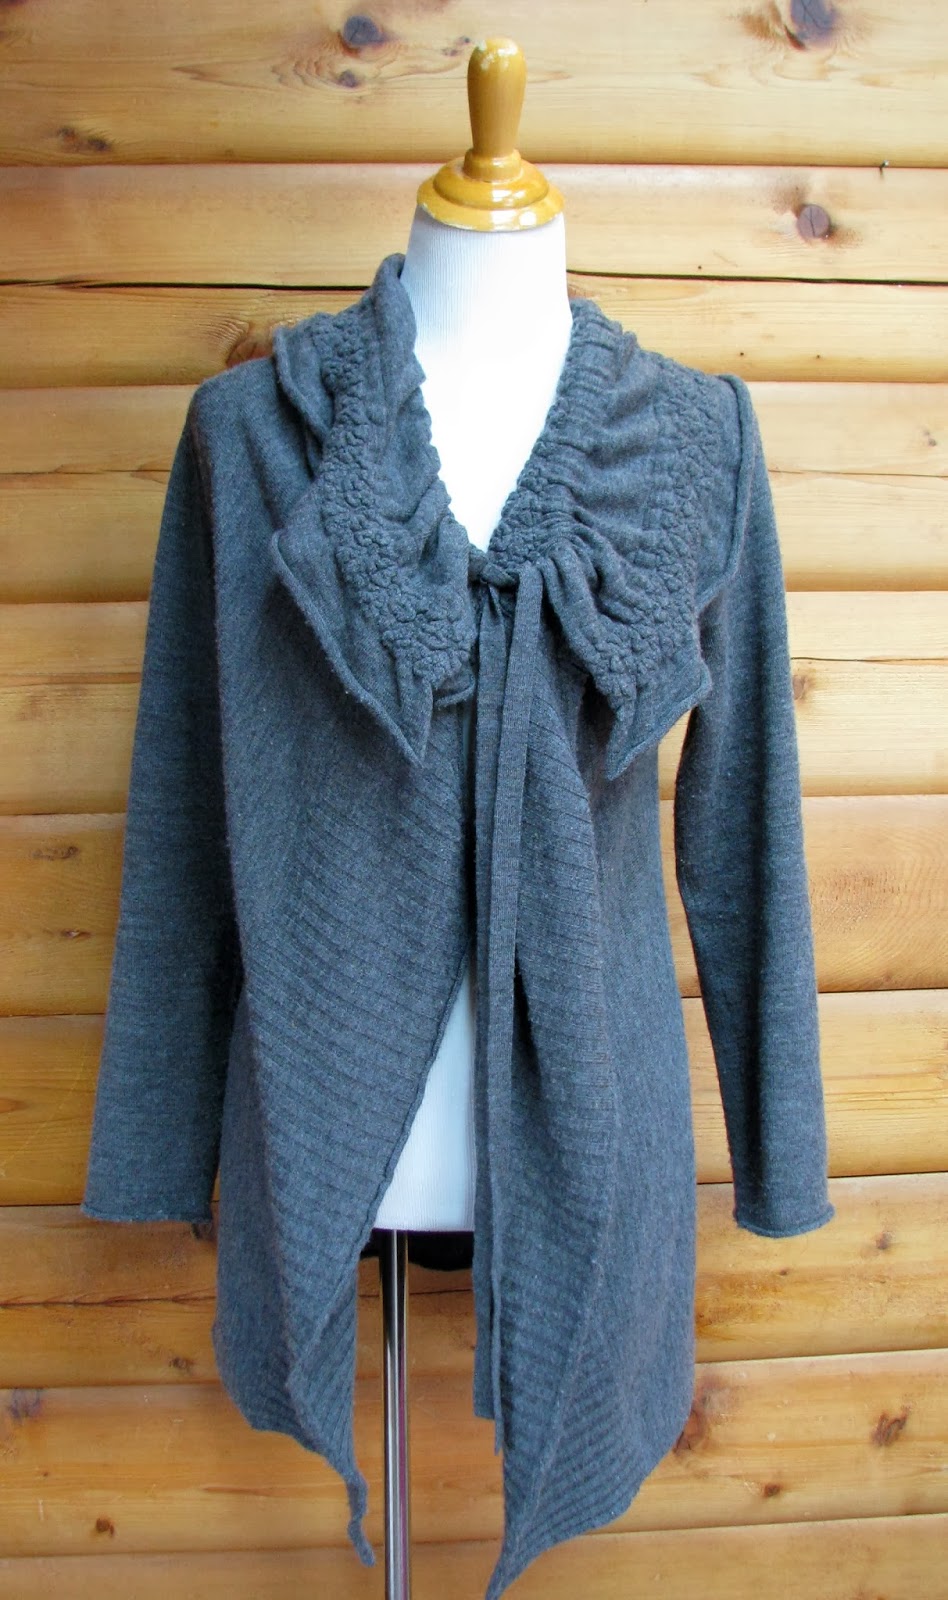
Hold one end of your sleeve to keep it in place, use the other to make small sweeps with the pumice stone. Brush away the little fur balls as they pile up. Keep going, double checking front, back, sides, and details (like ties and collars).
Shake off your fluff balls and use a lint roller (or tape wrapped around your hand, sticky side out) to get the last bits.
Now, doesn't that look better? I'd love to hear what you are going to spruce up first!
Love this sweater? You can get it in the shop this week!
http://www.ebay.com/itm/MOTH-Anthropologie-Grey-Long-Sweater-Coat-Wool-Ruffle-Women-Medium-/131101608272?


Tuesday, November 6, 2012

Handstitched Projects for Real Deal Bedrest

No more half a*s bedrest.
I didn't realize how much I've begun popping up and "just getting a little something done". The dishes in the dishwasher are not important. A half done bun in the oven...very important. It's not that I've HAD to it's just so hard NOT to! We are just 6 months along and continuing to having a gazillion contractions. My Fisherman's dear Mom has come up for the week and will be both keeping me company and generally helping get things caught up. My own wonderful mother, caring friends, and The Fisherman himself have all been wonderful. It's really I who haven't asked for the help I've been needing.  *There are baking, canning, and general busy-ness posts already photographed and scheduled to be shared but I promise I'm taking it easy*

So...this week I'll be working on the following projects:


Embroidered cuckoo clock from Little Dear Tracks. I'm particularly excited about this one!

400 pom poms. These are darling book marks by Design Mom but I'll be making little red pom poms for an upcoming holiday garland project.

Some variation of these gorgeous handstitched Frida Kahlo embroideries. Fabric and Embroidery Hoop by nicolemonjeau , all felt Hoop by BirdFace, Frida pattern by laceandsparrow.

What's up for your week? I'd love to hear!
xo,
Amy


Saturday, November 3, 2012

Little Chick Thrifty Quilt- in progress

This isn't your average quilt. It's thrifty and easy. I know you can do this and if you have actual quilting experience...no doubt even better. But if you have no experience but can stitch a stitch- you can make this, too.

I used:
a thrifted sheet with embroidered trim, cut into 42" square
wool blanket someone had washed and tossed in the dryer- super soft!
found doily and sweet hanky I stitched with one of my favorite embroidery patterns you can see here, Aunt Martha's 3753

Lay 'em out, stitch 'em up!
Place your scrappy bits (lace, trim, doilies, hankies, etc) on your top sheet until you have the look you want. Sew in place.

Now, lay your blanket right side DOWN on your kitchen floor. Layer your sheet on top, right side UP. Pin and smooth, pin and smooth. You want to make sure you don't stitch any lumps in place.

I used my acrylic ruler that happened to be four inches wide to draw lines across the quilt with a disappearing ink pen. Hand stitch (or machine) down each line.

The blanket is almost done! I still need to make the binding (using this method) and bind it. Bedrest has me stitching up a storm but no able to dash off for the perfect fabric for the trim. I'm a big believer in using what you have but I want a certain something not in my collection of fabrics. We'll see if I hold out for a fabric shop run or make do! I'll post the finished quilt soon. For more crafty ideas, follow along with my Pinterest board, Handmade and Handmade Embroidery!
What are you working up lately?
xo,
Amy

Sunday, October 28, 2012

Embroidery Projects- finished!

A couple of weeks ago I shared a handful of stitchery projects I was working on. Well, I finished them up and a few more, too!

                                                   Aunt Martha's 3753 Barnyard Happenings


another pick from Aunt Martha's Hooty Owls #3771
a happy little whale. not sure where I found him.

What projects are you working on? For more of my favorite embroidery ideas and patterns, follow along with my Pinterest board: Handmade, Embroidery!
Enjoy!
xo,
Amy


Friday, October 26, 2012

Easy Gnome Costume with a Vampire Bonus

This isn't really a tutorial. It's an idea you can easily re-create.
A few years ago, I was a gnome. One of my guys was a vampire. Easiest. Costume. Ever.
For the mere hefty price of some super realistic glue in fangs and a black jacket, you have one instant costume. I know. It's been done. Because it's pretty darn good and easy.

A friend was going to be a gnome and had some great ideas on the basics. We split up the sewing, each making two of the same piece. Easy peasy! Share the work or spend a couple of hours whipping up the basics.

The Basics:

  • red felt cone hat (tutorial here, and here, 
  • beard (tutorials here, and here )
  • peasant blouse
  • wide leather belt or sash cut from brown fabric and tied
  • rain boots, faux boots, brown shoes or just forget the bottom half 'cause people will see the hat and the beard and smile and that is enough for me. 
Bam. You are a gnome!
Enjoy!
xo,
Amy

Wednesday, October 24, 2012

Little Embroidery Projects

Just a few things I've been working on in my abundant down time. I've been embroidering anything that will stand still long enough for me to get some stitches in! What have you been working on?
Aunt Martha's 3753 Barnyard Happenings


Just starting this little guy and haven't decided what color he'll be. Colorful is my go-to combo but he might be all in Blackwork...
Aunt Martha's 3771 Hooty Owls

Baby bumps are darn handy.
For more of my favorite embroidery ideas, follow along with my Pinterest board: Handmade- Embroidery!
Enjoy!
xo,
Amy
Update: Whew. See the finished embroidery here!

Saturday, October 20, 2012

Vintage Book Bunting

I know it's not even Halloween but it's never too early to start getting ready for Christmas. The bias tape was made in one long Saturday of sewing heaven using a lovely tutorial by Coletterie Patterns (see link below). You are going to want to spend some time on this blog. Bite size tidbits to help your sewing skills grow.
Green Eggs and Ham with a damaged cover becomes a cheery bunting instead!

Coletterie Bias Tape Tutorial. Start with this one until it really clicks.
Then kick out your bias tape quick with this more advance method for continuous bias tape here.

For more of my favorite paper crafting ideas, follow along with my Pinterest board: Handmade- Paper!
Enjoy,
Amy
Related Posts Plugin for WordPress, Blogger...